Shogi game explained
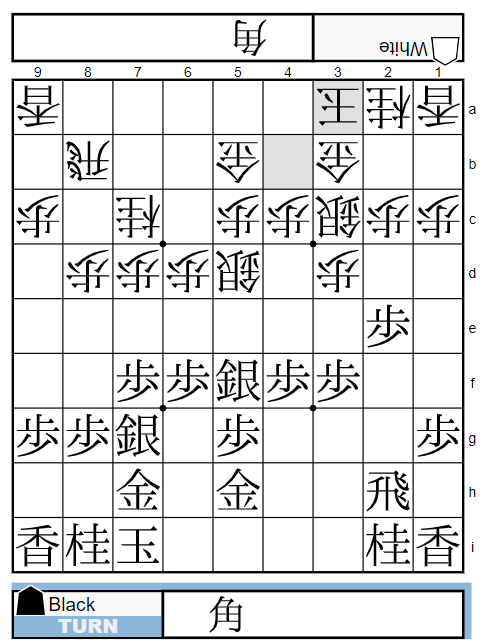
(Text moves) 1.P2f 2.P3d 3.P7f 4.G3b 5.P2e 6.Bx8h+ 7.Sx8h 8.S2b
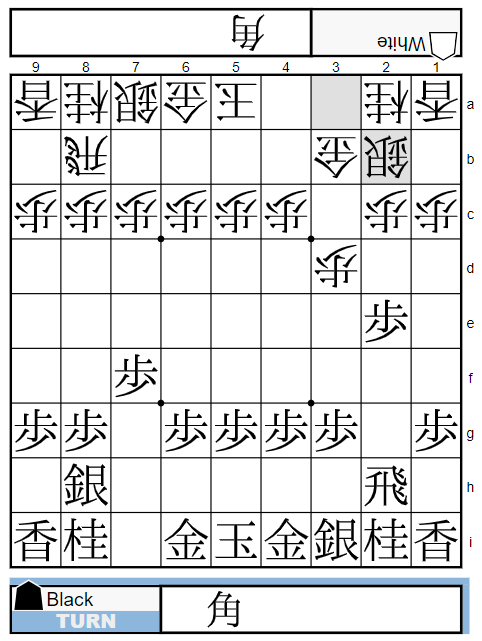
Bishop Exchange opening.
(Text moves) 9.S3h 10.S6b 11.G7h 12.S3c 13.K6h 14.P8d
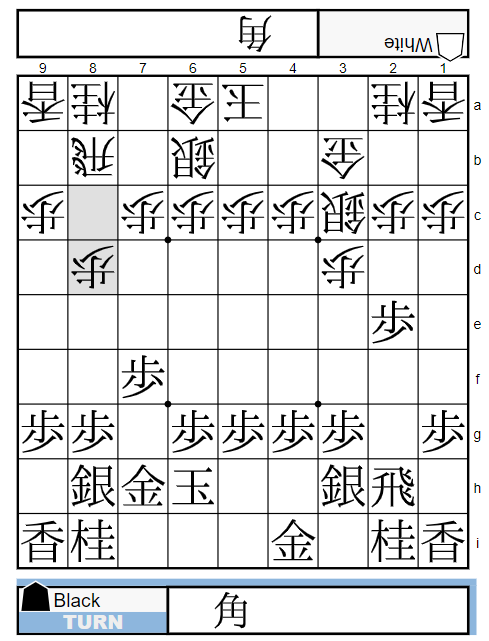
both sides develop pieces.
(Text moves) 15.S7g 16.P6d 17.P4f 18.S6c

(Text moves) 19.S4g 20.K4b 21.G5h 22.G5b 23.S5f 24.P7d
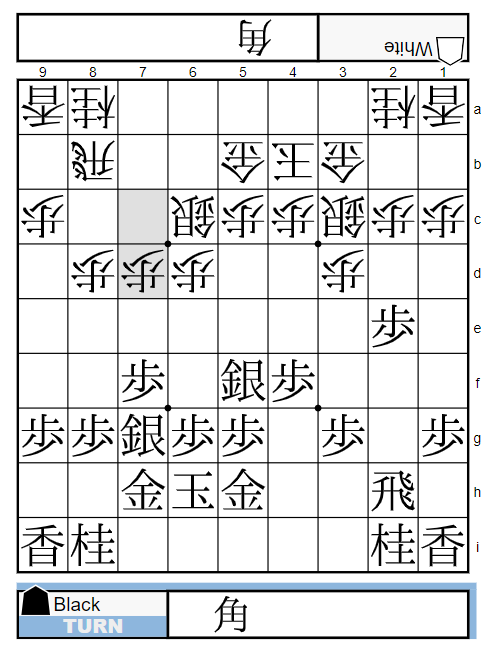
(Text moves) 25.P3f 26.N7c 27.P6f 28.S5d 29.K7i 30.K3a
both sides keep developing pieces.
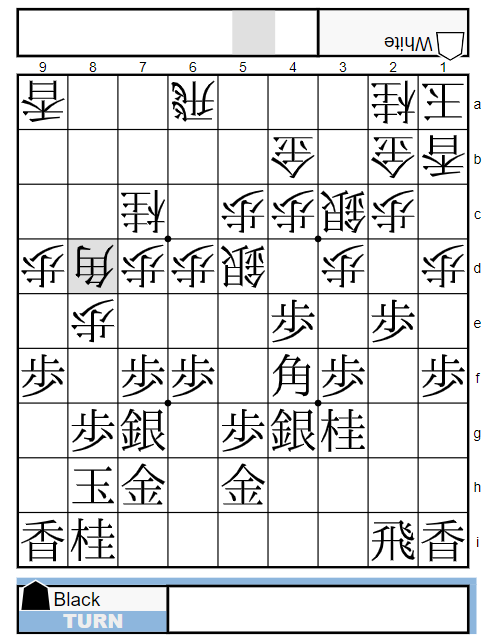
(Text moves) 31.P1f 32.P1d 33.P4e 34.R6b 35.P9f 36.P9d
the structure of 2e-Pawn and 4e-Pawn combination isn’t common as Black.
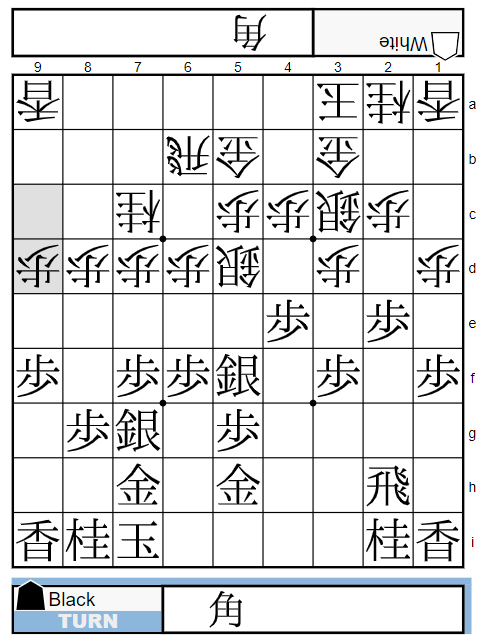
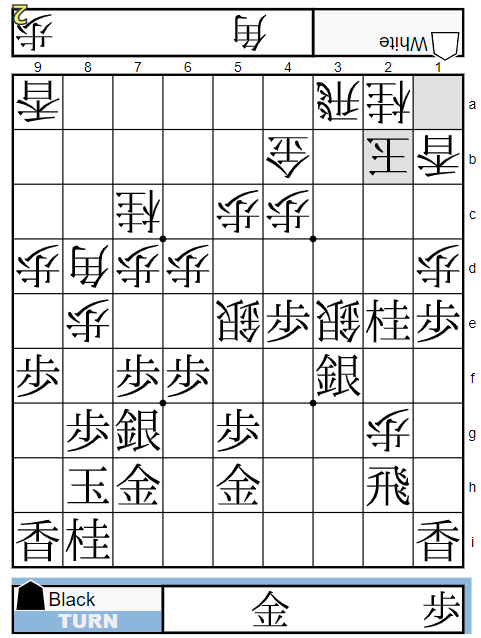
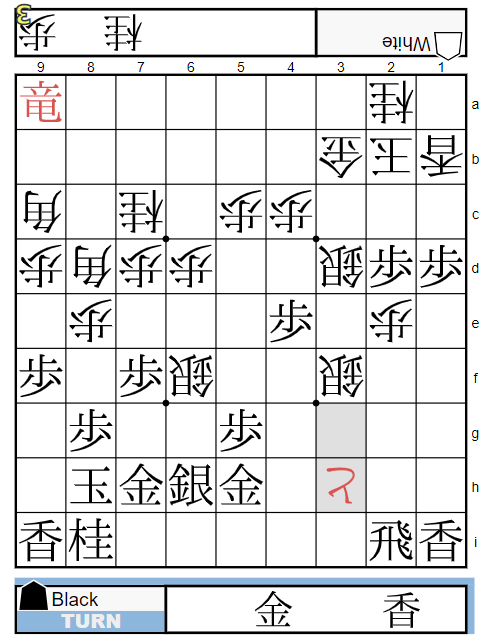
(Text moves) 37.S6h 38.B*4f 39.B*3g 40.Bx3g+ 41.Nx3g 42.K2b
37.S6h: escapes in advance before 7c-Knight comes at some point.
38.B*4f: if Black plays 39.R1h, White would play 40.P6e
(Text moves) 43.B*4f 44.R6a 45.R4h 46.G5b-4b
43.B*4f: putting a Bishop on 4f(6d)is common in Bishop exchange games.
(Text moves) 47.R2h 48.G5b 49.K8h 50.G5b-4b

47.R2h: Black can’t improve positions.
48.G5b: White is fine with the repetition of moves(the fourfold-repetition rule)
(Text moves) 51.R4h 52.L1b 53.R2h 54K1a

52.L1b: 54.K1a: White enters into Anaguma
51.R4h 53.R2h: Black keeps waiting.
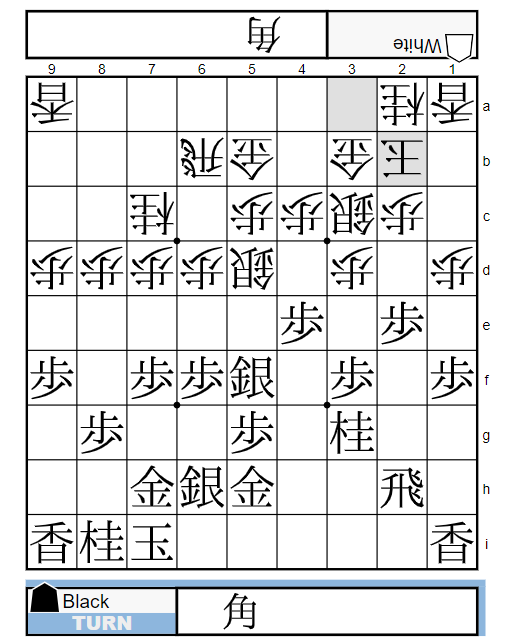
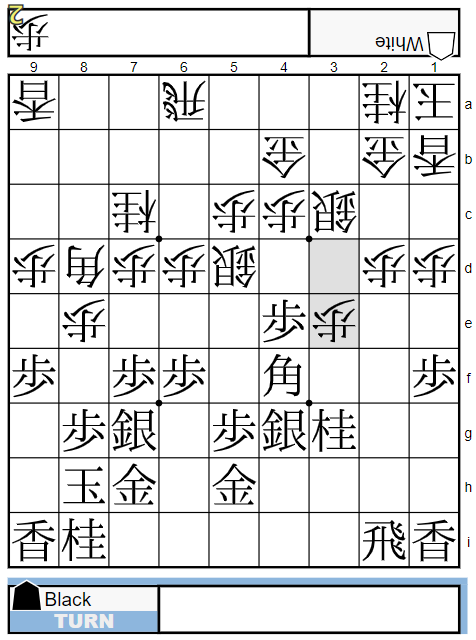
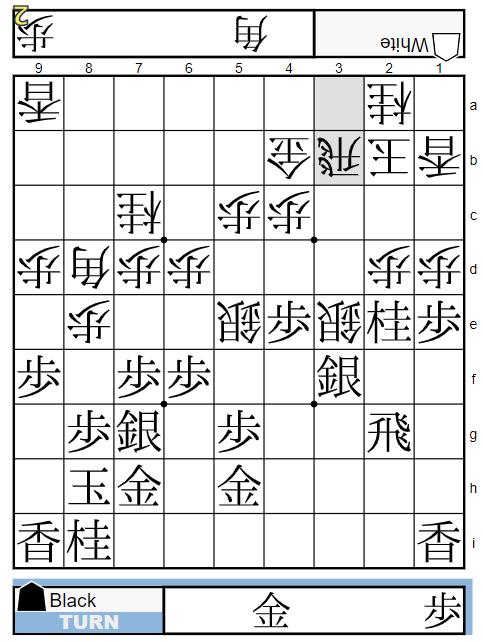
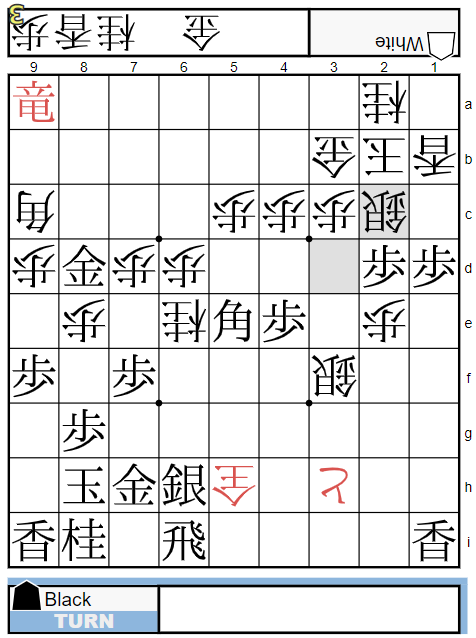
(Text moves) 55.S4g 56.G2b 57.R2i 58.P8e 59.S7g 60.B*8d
56.G2b: this is how to develop Anaguma in Double Static Rook games. 56.S2b allows 57.P2d
60.B*8d: tries to get out of the repetition of moves but it gives chance to Black to attack.
(Text moves) 61.P2d 62.Px2d 63.P3e 64.Px3e
61.P2d: perfect timing. it’s hard to take on 2d with 3c-Silver for White because 62.Sx2d 63.Bx2d 64.Px2d 65.S*7b 66.R6b 67.S8c+
63.P3e: threatens Px3d Sx3d Bx2d
(Text moves) 65.Bx3e 66.S5e 67.P*2e 68.Px2e
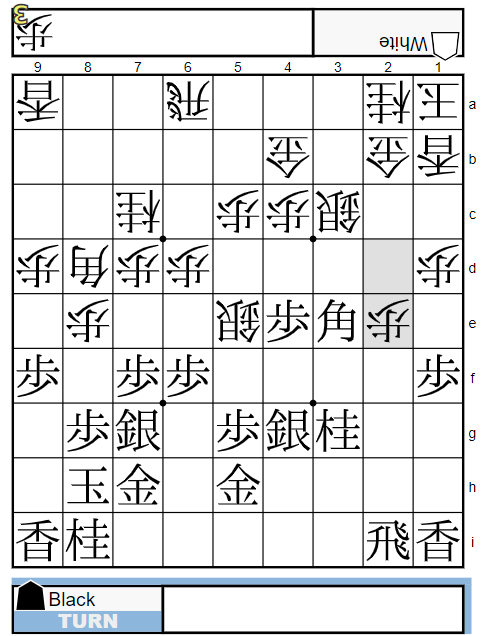
66.S5e: prevents B4f and attack 6f-square. White tries to refute Black’s attack. if White plays a natural move, 66.P*3d, Black would play 67.B4f threatening P*2e.
67.P*2e: 68.P*3d is a candidate move but after 69.Sx3d 70.Bx2d 71.G4b-3b, it’s hard to keep attacking for Black.
68:Px2e: if White plays 69.S3d,Black would play 70.Px2d
(Text moves) 69.Nx2e 70.S3d 71.S3f 72.R3a
71.S3f: good move. now White has 4 attackers. if Black plays 71.B1g, White would play 72.P*2d
72.R3a: threatens Sx3e
(Text moves) 73.P1e 74.Sx3e 75.P*2c 76.P*2h

73.P1e: ignores the threat and tries to add more attackers.
75.P*2c: awesome counter-attack. if White plays 76.Gx2c, Black would play 77.Sx3e 78.Rx3e 79.N1c+ opening up the White Rook’s file.
(Text moves) 77.Rx2h 78.P*2g 79.Px2b+ 80.Kx2b
78.P*2g: pawn sacrifice to get the Black’s Rook attacked when White plays Sx3f
(Text moves) 81.Rx2g 82.P*2d 83.P*3b 84.Rx3b
82.P*2d: if White plays 82.Sx3d, Black will play 83.N1c+. if White plays 82.P*2f, Black would play 83.Sx3e 84.Px2g+ 85.P*3c.
(Text moves) 85.P*3c 86.Sx3f 87.Px3b+ 88.Gx3b
83.P*3c: blocks the White’s Rook. if White plays 83.Nx3c, Black will play 84.Sx3e.
(Text moves) 89.Px1d 90.Px2e 91.R2i 92.Sx6f
89.Px1d: if White plays 90.Sx2g+, Black would play 91.P*3c
92.Sx6f:White starts attacking.
(Text moves) 93.R*8a 94.B*9c 95.P*2d 96.S*3d

94.B*9c: White isn’t happy with this move.
95.P2d: threatens G*2c Gx2c Rx2a+ Kx2a Px2c+.
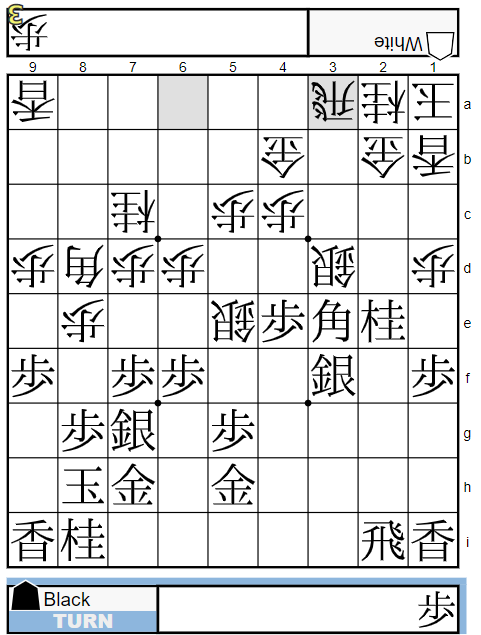
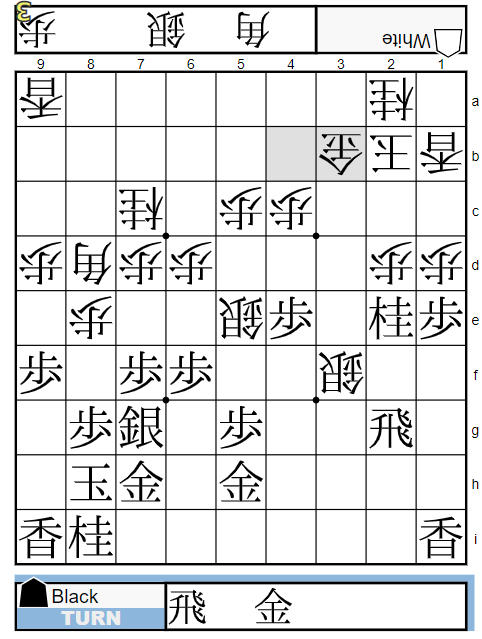
(Text moves) 97.S6h 98.P*3g 99.Rx9a+ 100.P3h+
97.S6h:Black plays it safe.
98.P*3e 100.P3h+: try to kick away the Black’s Rook and White takes entering king into consideration.
(Text moves) 101.R6i 102.N6e 103.G*8c 104.Sx5g 105.Gx8d 106.Sx5h+

103.G*8c: Black tries to remove White’s attackers.
106.Sx5h+: if White plays 106.Bx8d, Black would play 107.Sx5g 108.Nx5g+ 109.Rx6d attacking 3d-Silver.
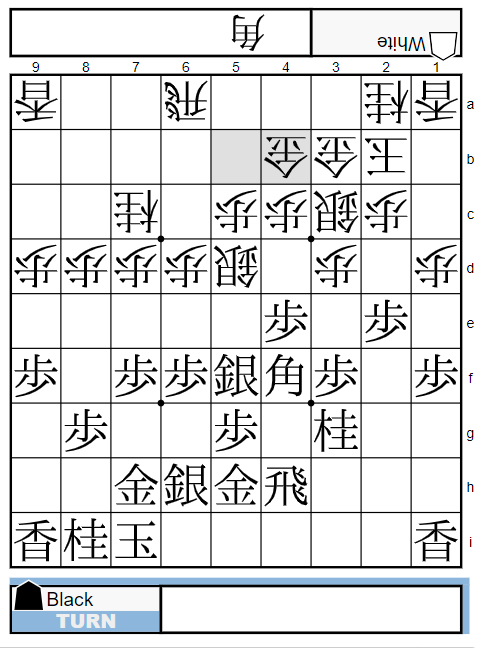
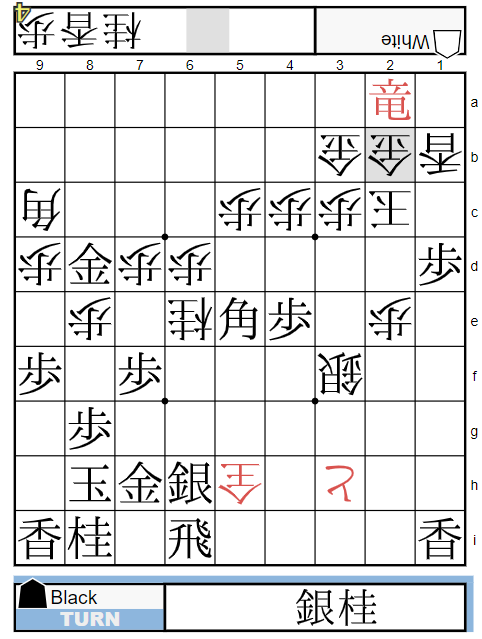
(Text moves) 107.B*5e 108.P*3c 109.L*2c 110.Sx2c
107.B*5e: good move. it cuts off the White king’s escape route, 3c-suquare.
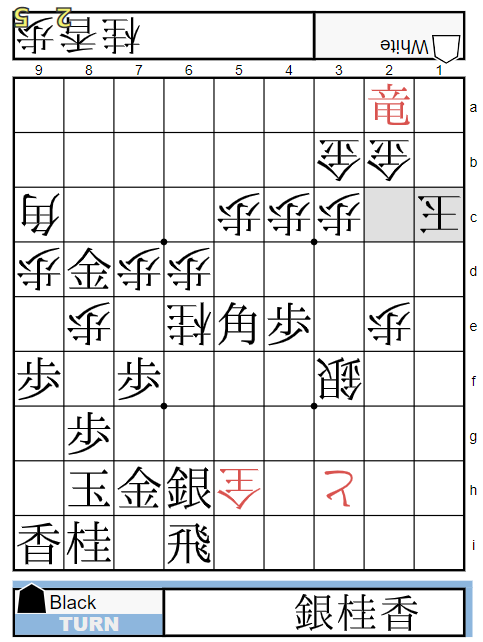
(Text moves) 111.Px2c+ 112.Kx2c 113.+Rx2a 114.G*2b
112.Kx2c:trys to escape in the upper.
114.G*2b: Black tries to kick away the promoted Rook with tempo
(Text moves) 115.P1c+ 116.Lx1c 117.Lx1c+ 118.Kx1c
115.P1c+ 117.Lx1c+: Black tries to keep attacking.
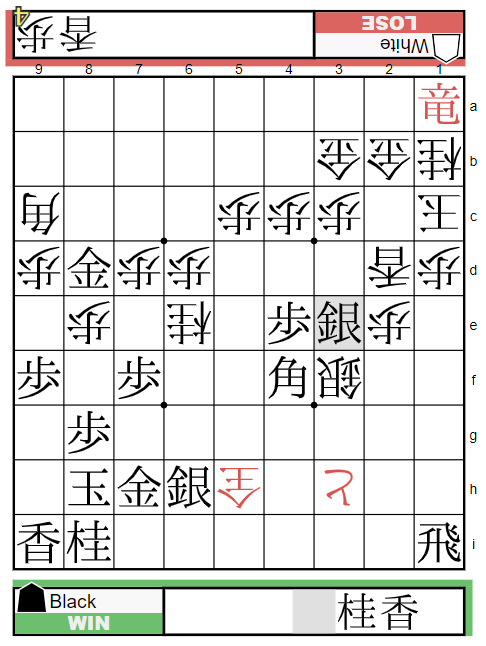
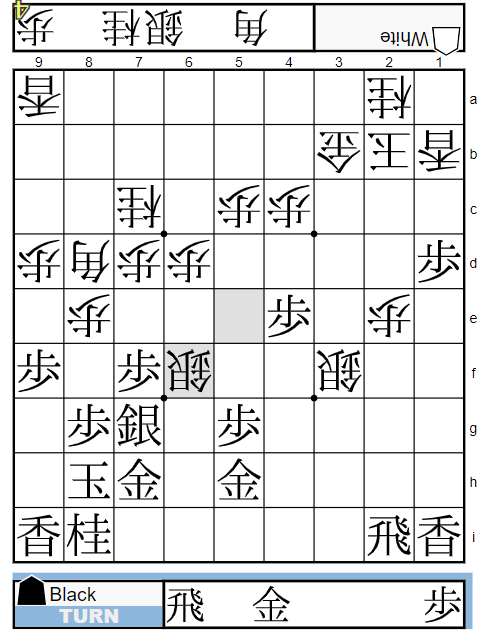
(Text moves) 119.B4f 120.L*2d 121.+R1a 122.N*1b
122.N*1b: 122.G1b doesn’t work because 123.L*1e 124.P*1d 125.Lx1d 126.Kx1d 127.+Rx1b
(Text moves) 123.R1i 124.P*1d 125.S*3e resign.